
Ik ben net begonnen aan een nieuwe Moebius-sjaal voor de wederhelft, en moest weer helemaal in het geheugen duiken en dingen uitproberen vooraleer ik weer wist hoe het moest. Nochtans is het eigenlijk supersimpel, eens je weet hoe het moet. Er zijn ongetwijfeld veel tutorials op het web te vinden, maar dit is de manier waarop ik het doe. Let wel: het gaat over een gehaakte sjaal, geen gebreide.
1. Crochet the number of stitches you require. I needed 181.
1. Zet het aantal gewenste steken op. Ik had er 181 nodig.
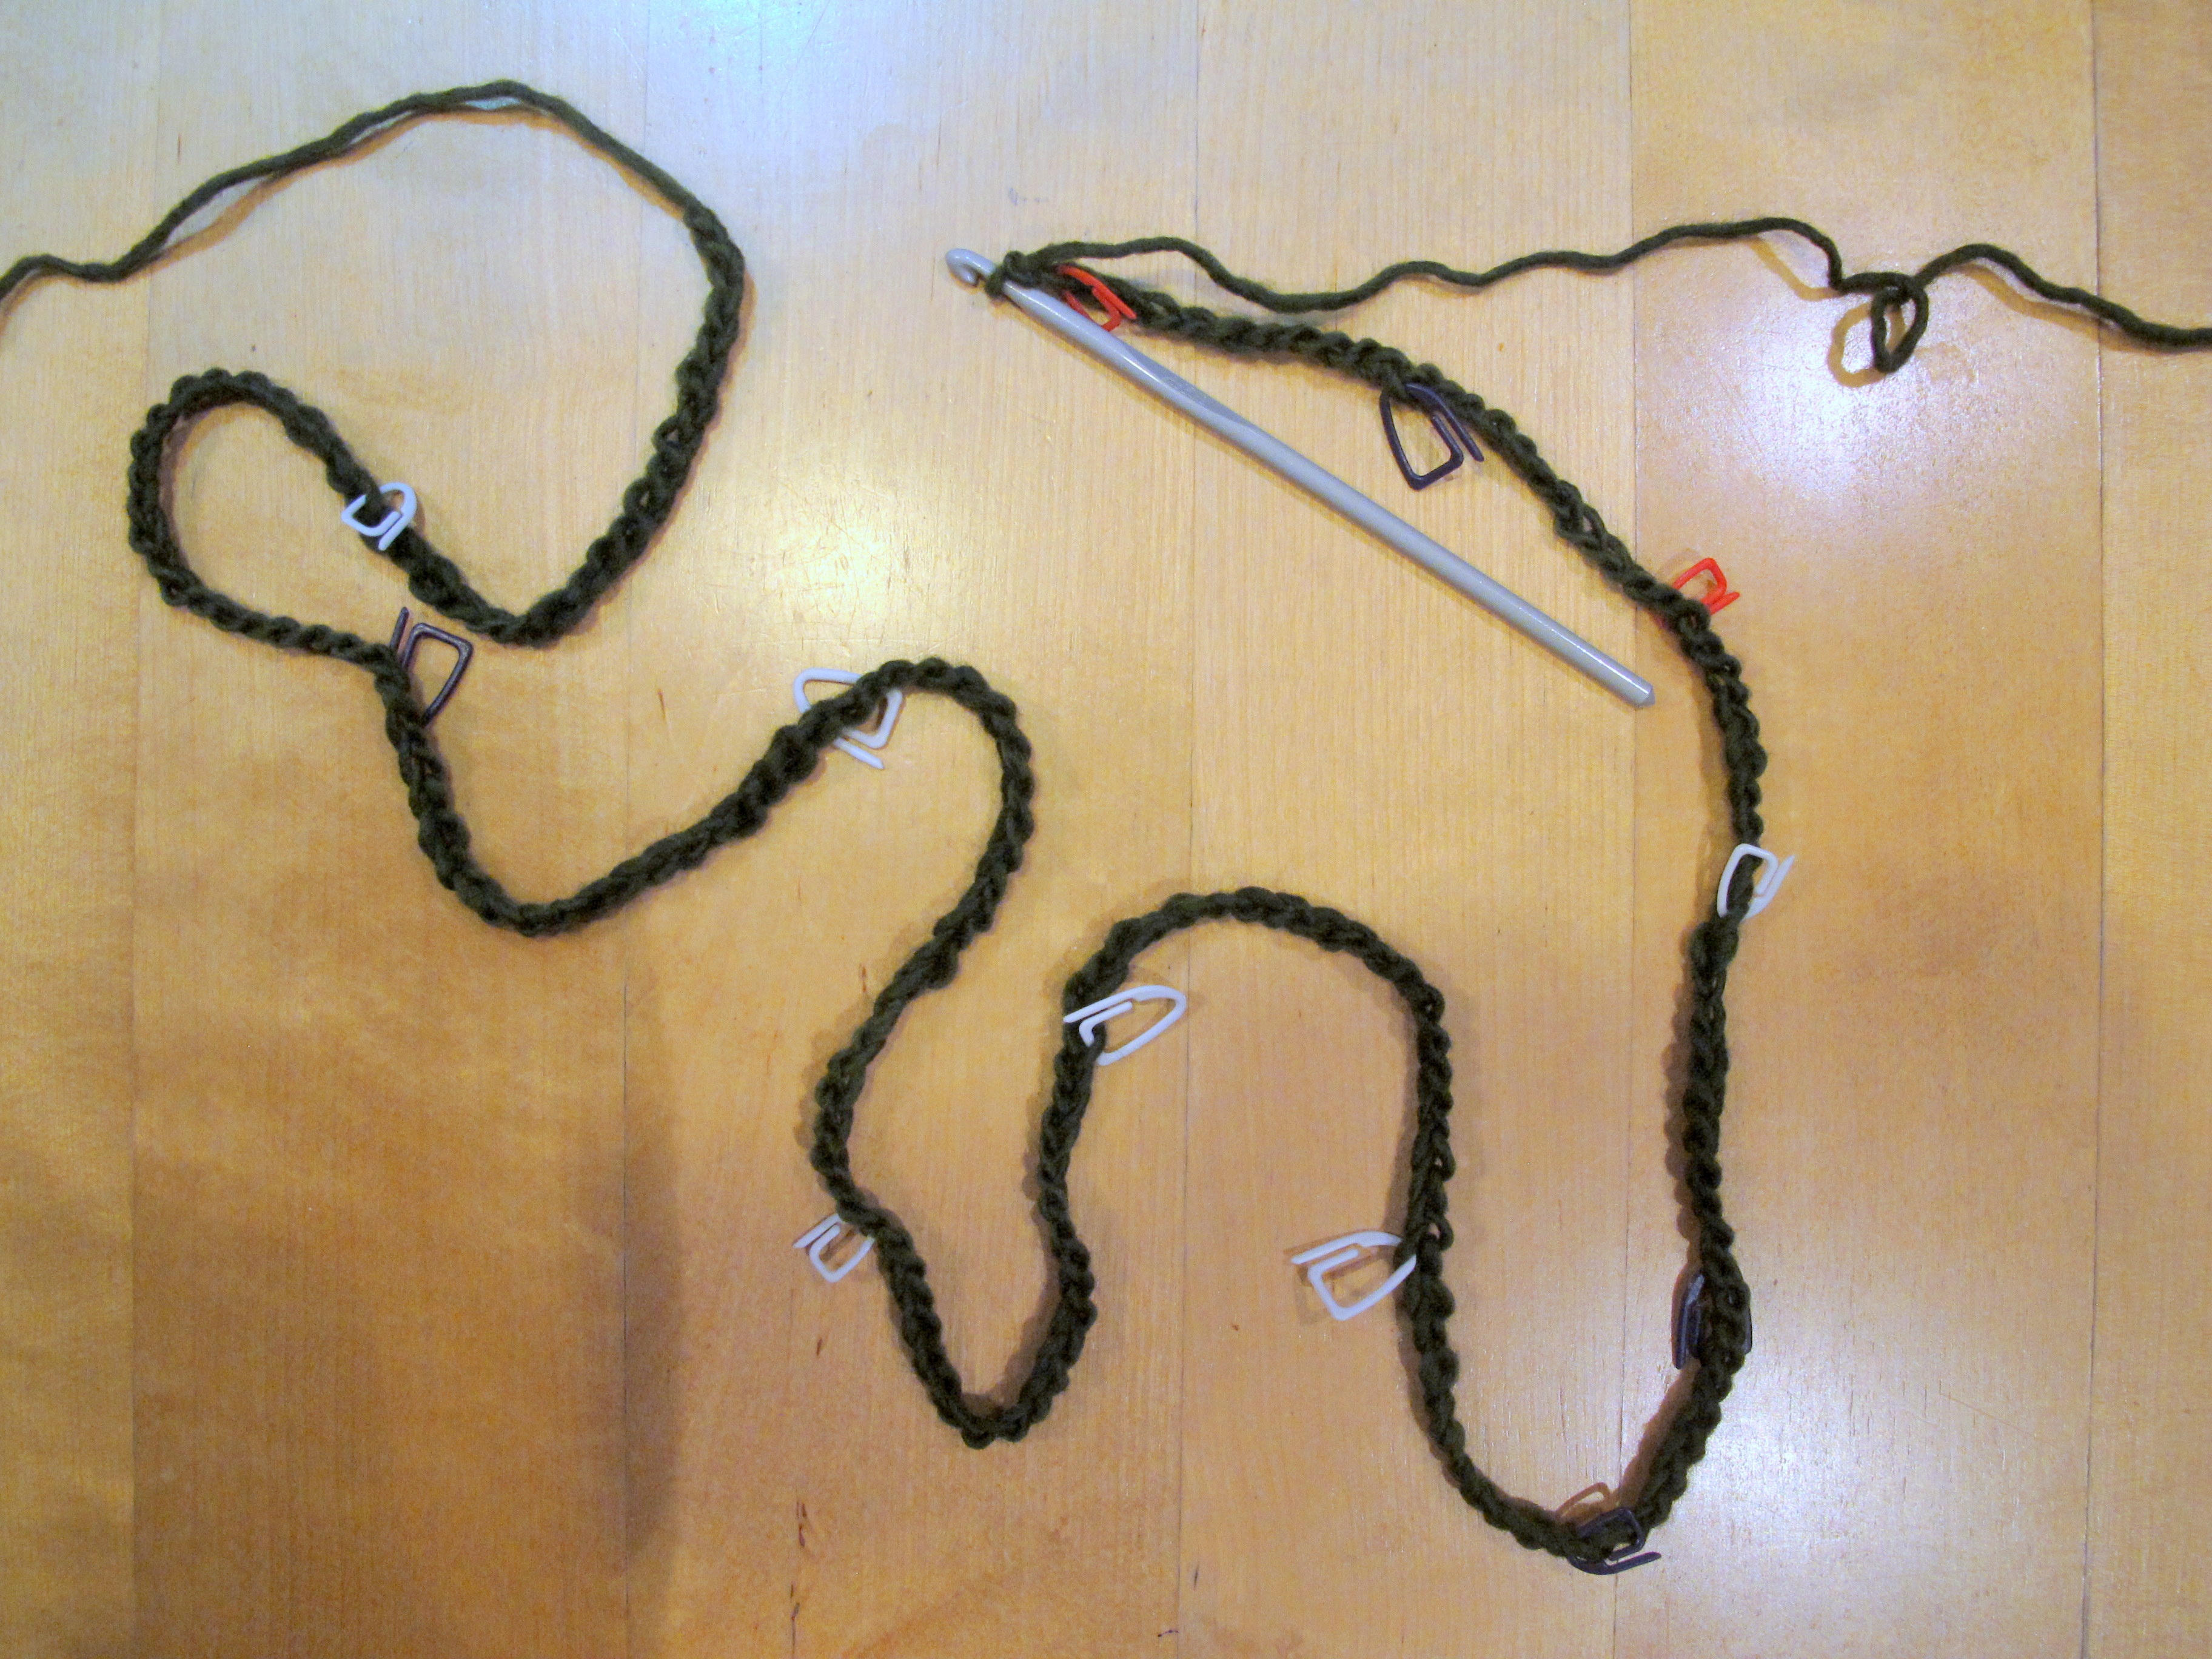
2. Use a slip stitch to attach the first stitch to the last. Make sure your stitches are straight. This is the most difficult part of it all. Swearing is allowed.
2. Maak de eerste en laatste steek aan mekaar vast. Let goed op dat de steken niet gedraaid zijn. Dit is het vervelendste onderdeel. Het gebruik van krachttermen is geoorloofd.
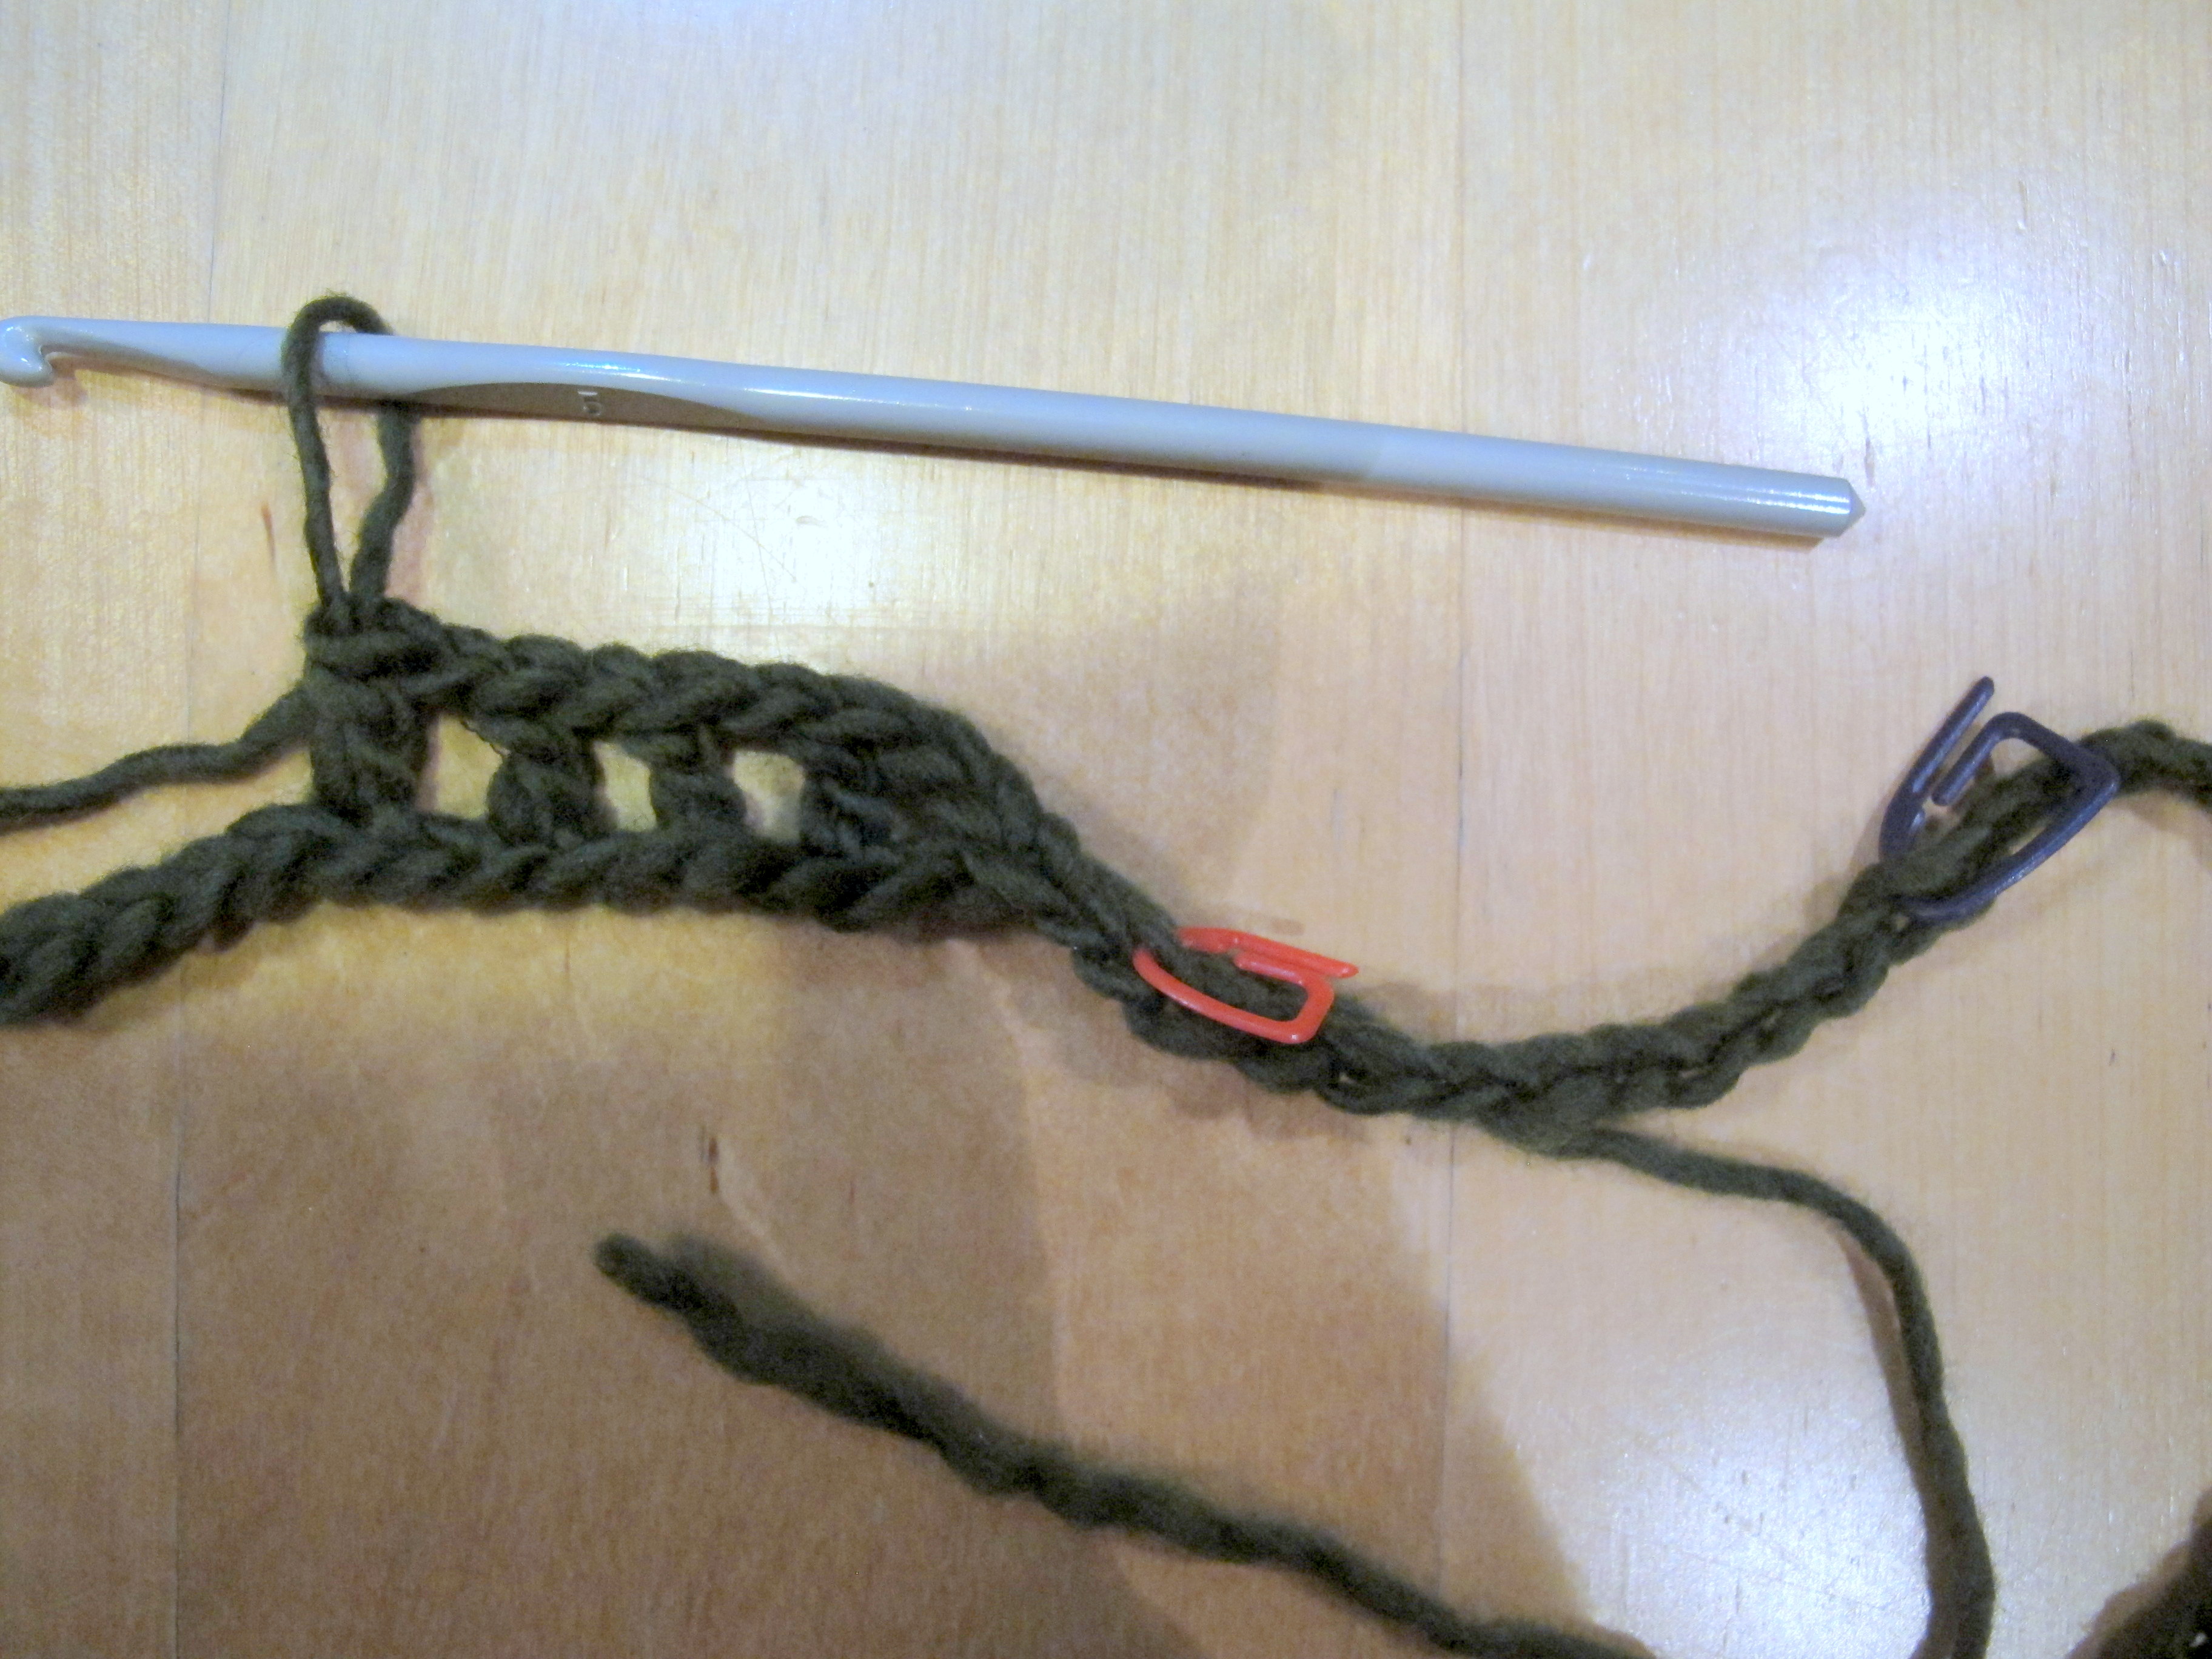
3. Crochet the first row as you normally would until the end of the first row.
3. Haak de eerste rij zoals gewenst. Hier maakte ik telkens een vaste + een losse. Doe zo de ganse eerste rij.
4. The end of the first row/beginning of the second row is where it all happens. Here you'll make the turn in the cowl to create the Moebius-effect. The first picture shows the normal situation (not Moebius): you put both top parts together and continue on you next row. The bottom is always the bottom part, the top always the top part, no matter how many rows you crochet.
4. Op het einde van de eerste rij maken we de draai in de sjaal die zorgt voor het Moebius-effect. Op de eerste foto zie je de normale toestand: als je beide bovenkanten met mekaar verbindt, kan je zo altijd hoger verder haken. Je hebt dan geen draai in je sjaal en elke rij heeft een begin en een einde. De onderkant blijft de onderkant, de bovenkant blijft de bovenkant bij elke rij die erbij komt.
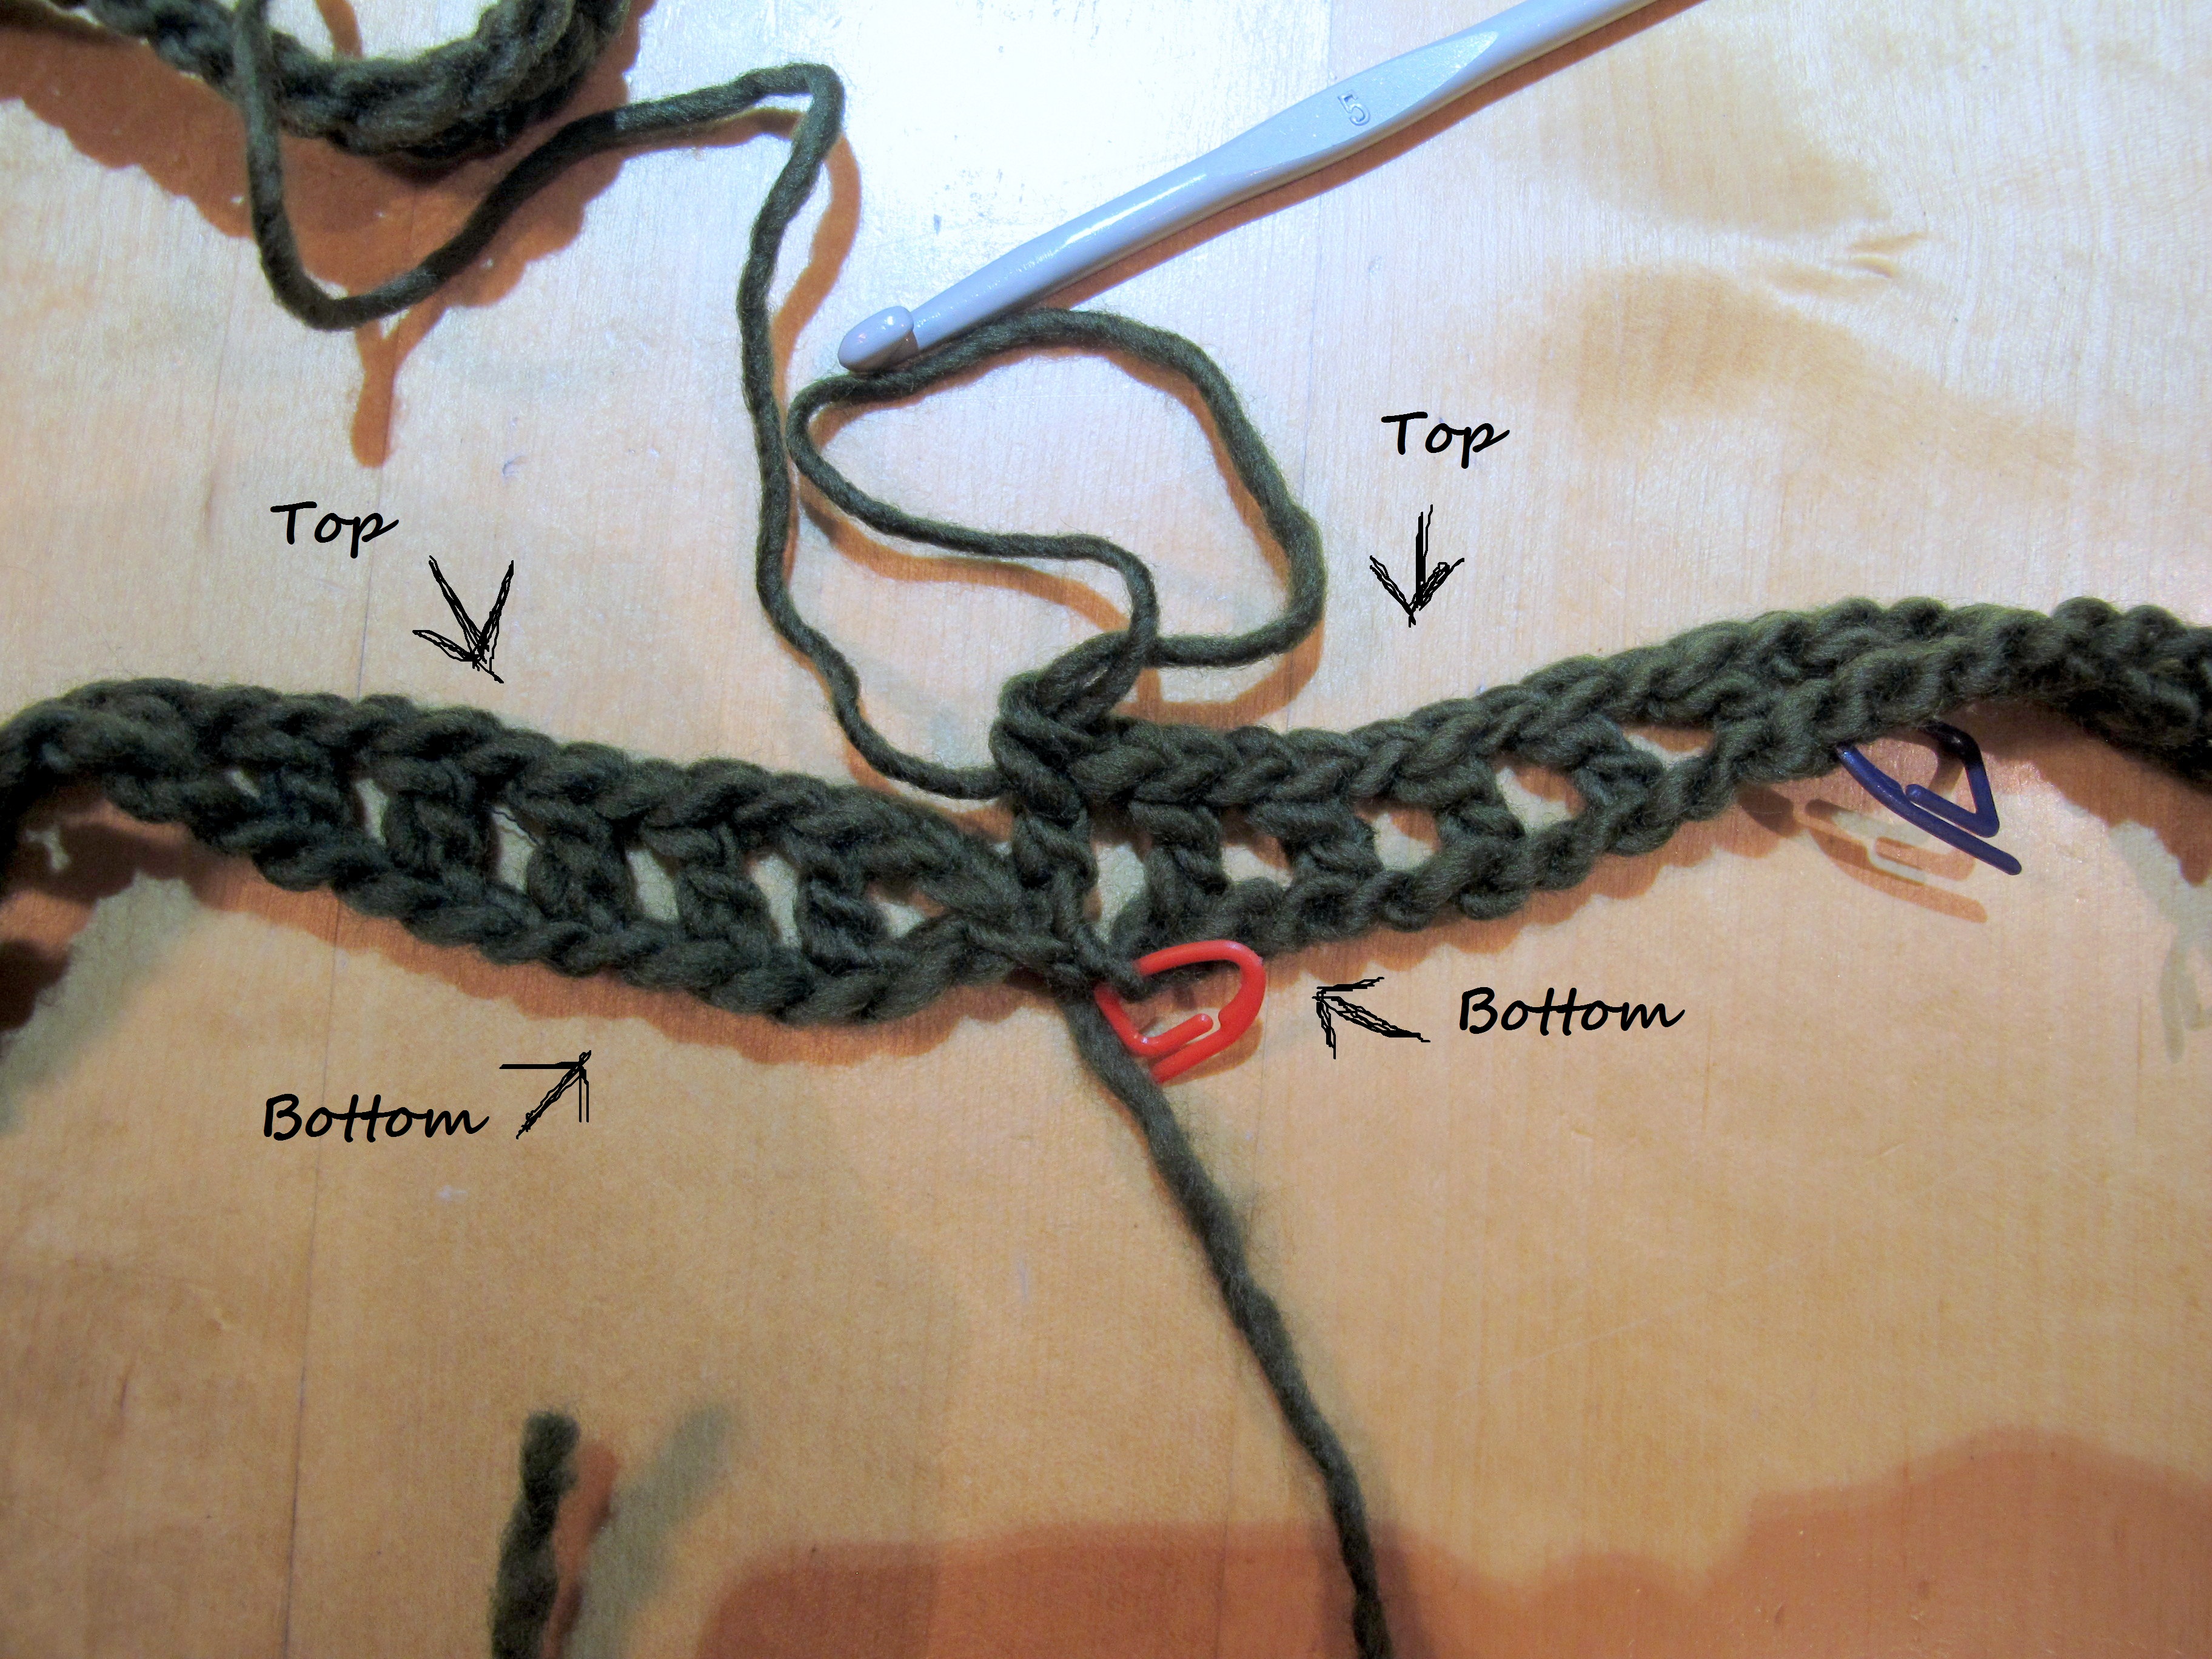
The second picture shows you how to create the Moebius-turn: simply crochet the bottom part of the left side to the top part of the right side.
Op de tweede foto zie je hoe je te werk gaat om de draai in de sjaal te krijgen: je verbindt simpelweg de onderkant van het linkse gedeelte met de bovenkant van het rechtse gedeelte.
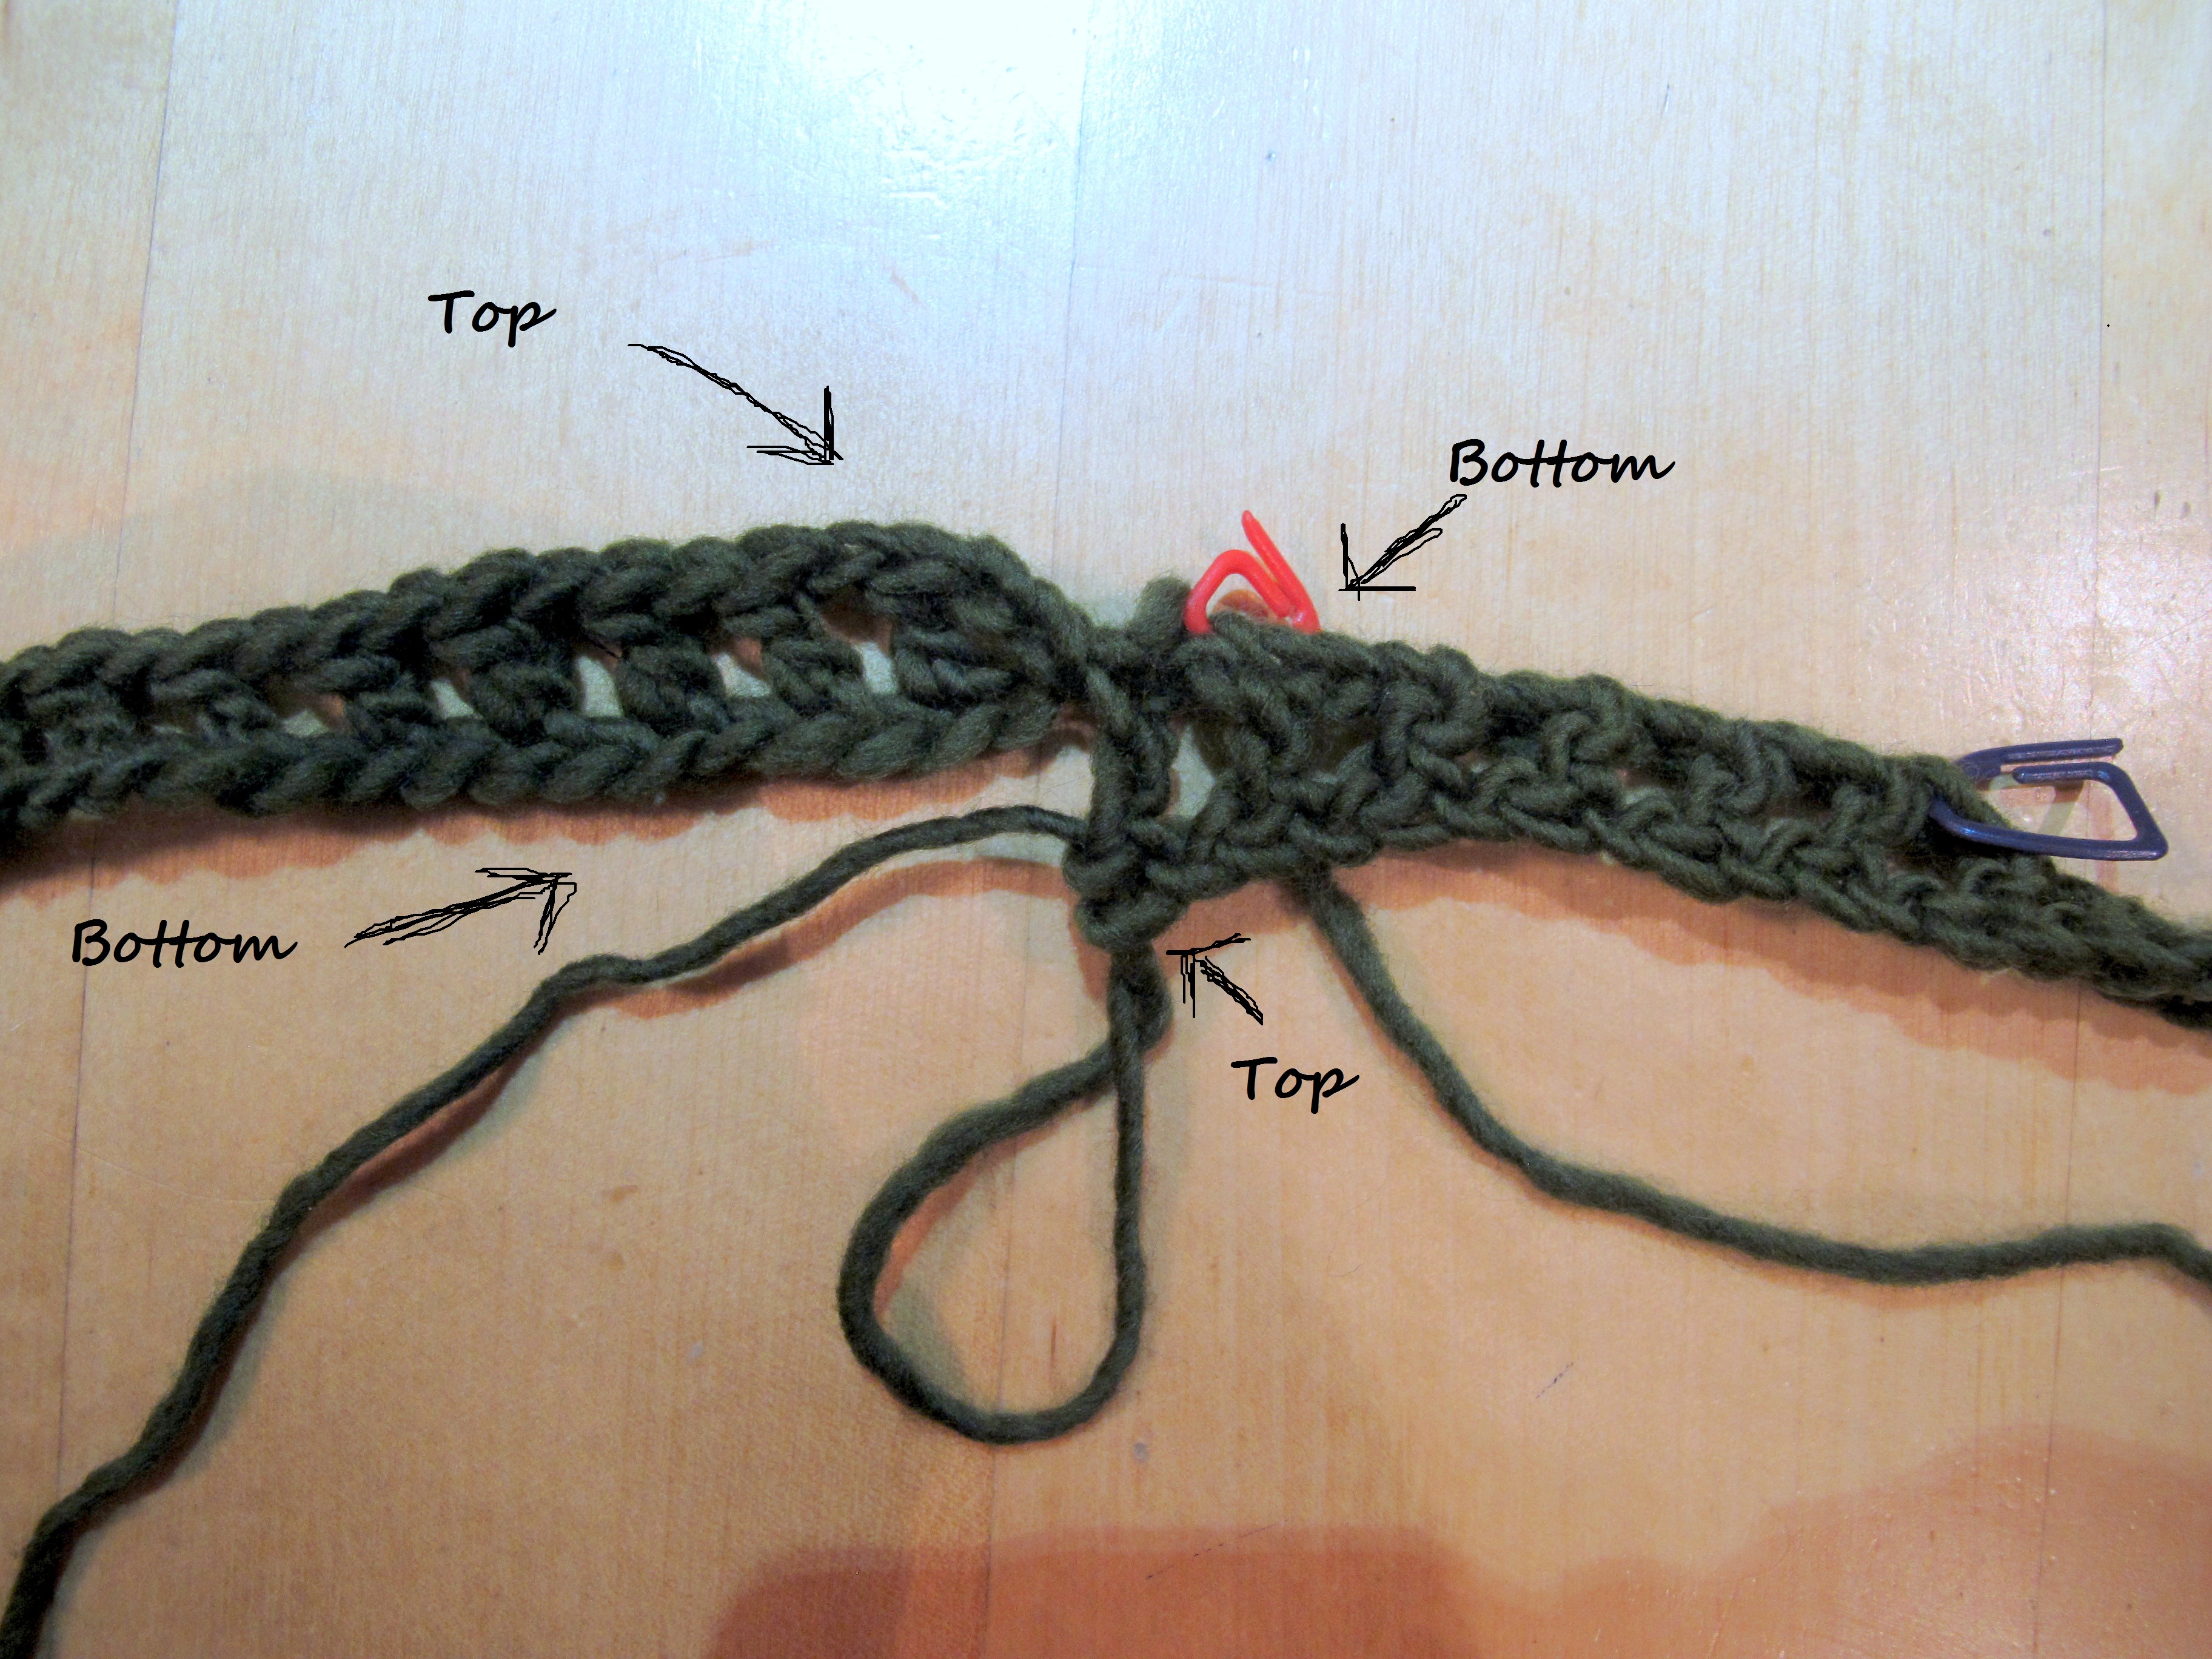
5. Your cowl should have a turn now. Check of there is a turn. Check of there's one and only one turn!!
5. Er moet nu een "draai" in je sjaal zitten. Controleer of die er inderdaad in zit. Controleer heel goed of je sjaal één en slechts één keer draait!!
6. Continue to crochet until you have reached the end of the first row. You'll notice that you started at the bottom, but end at the top of your work.
6. Haak verder tot je weer aan het einde van de rij komt. Je zal merken dat je aan de onderkant begonnen bent, maar aan de bovenkant "eindigt".

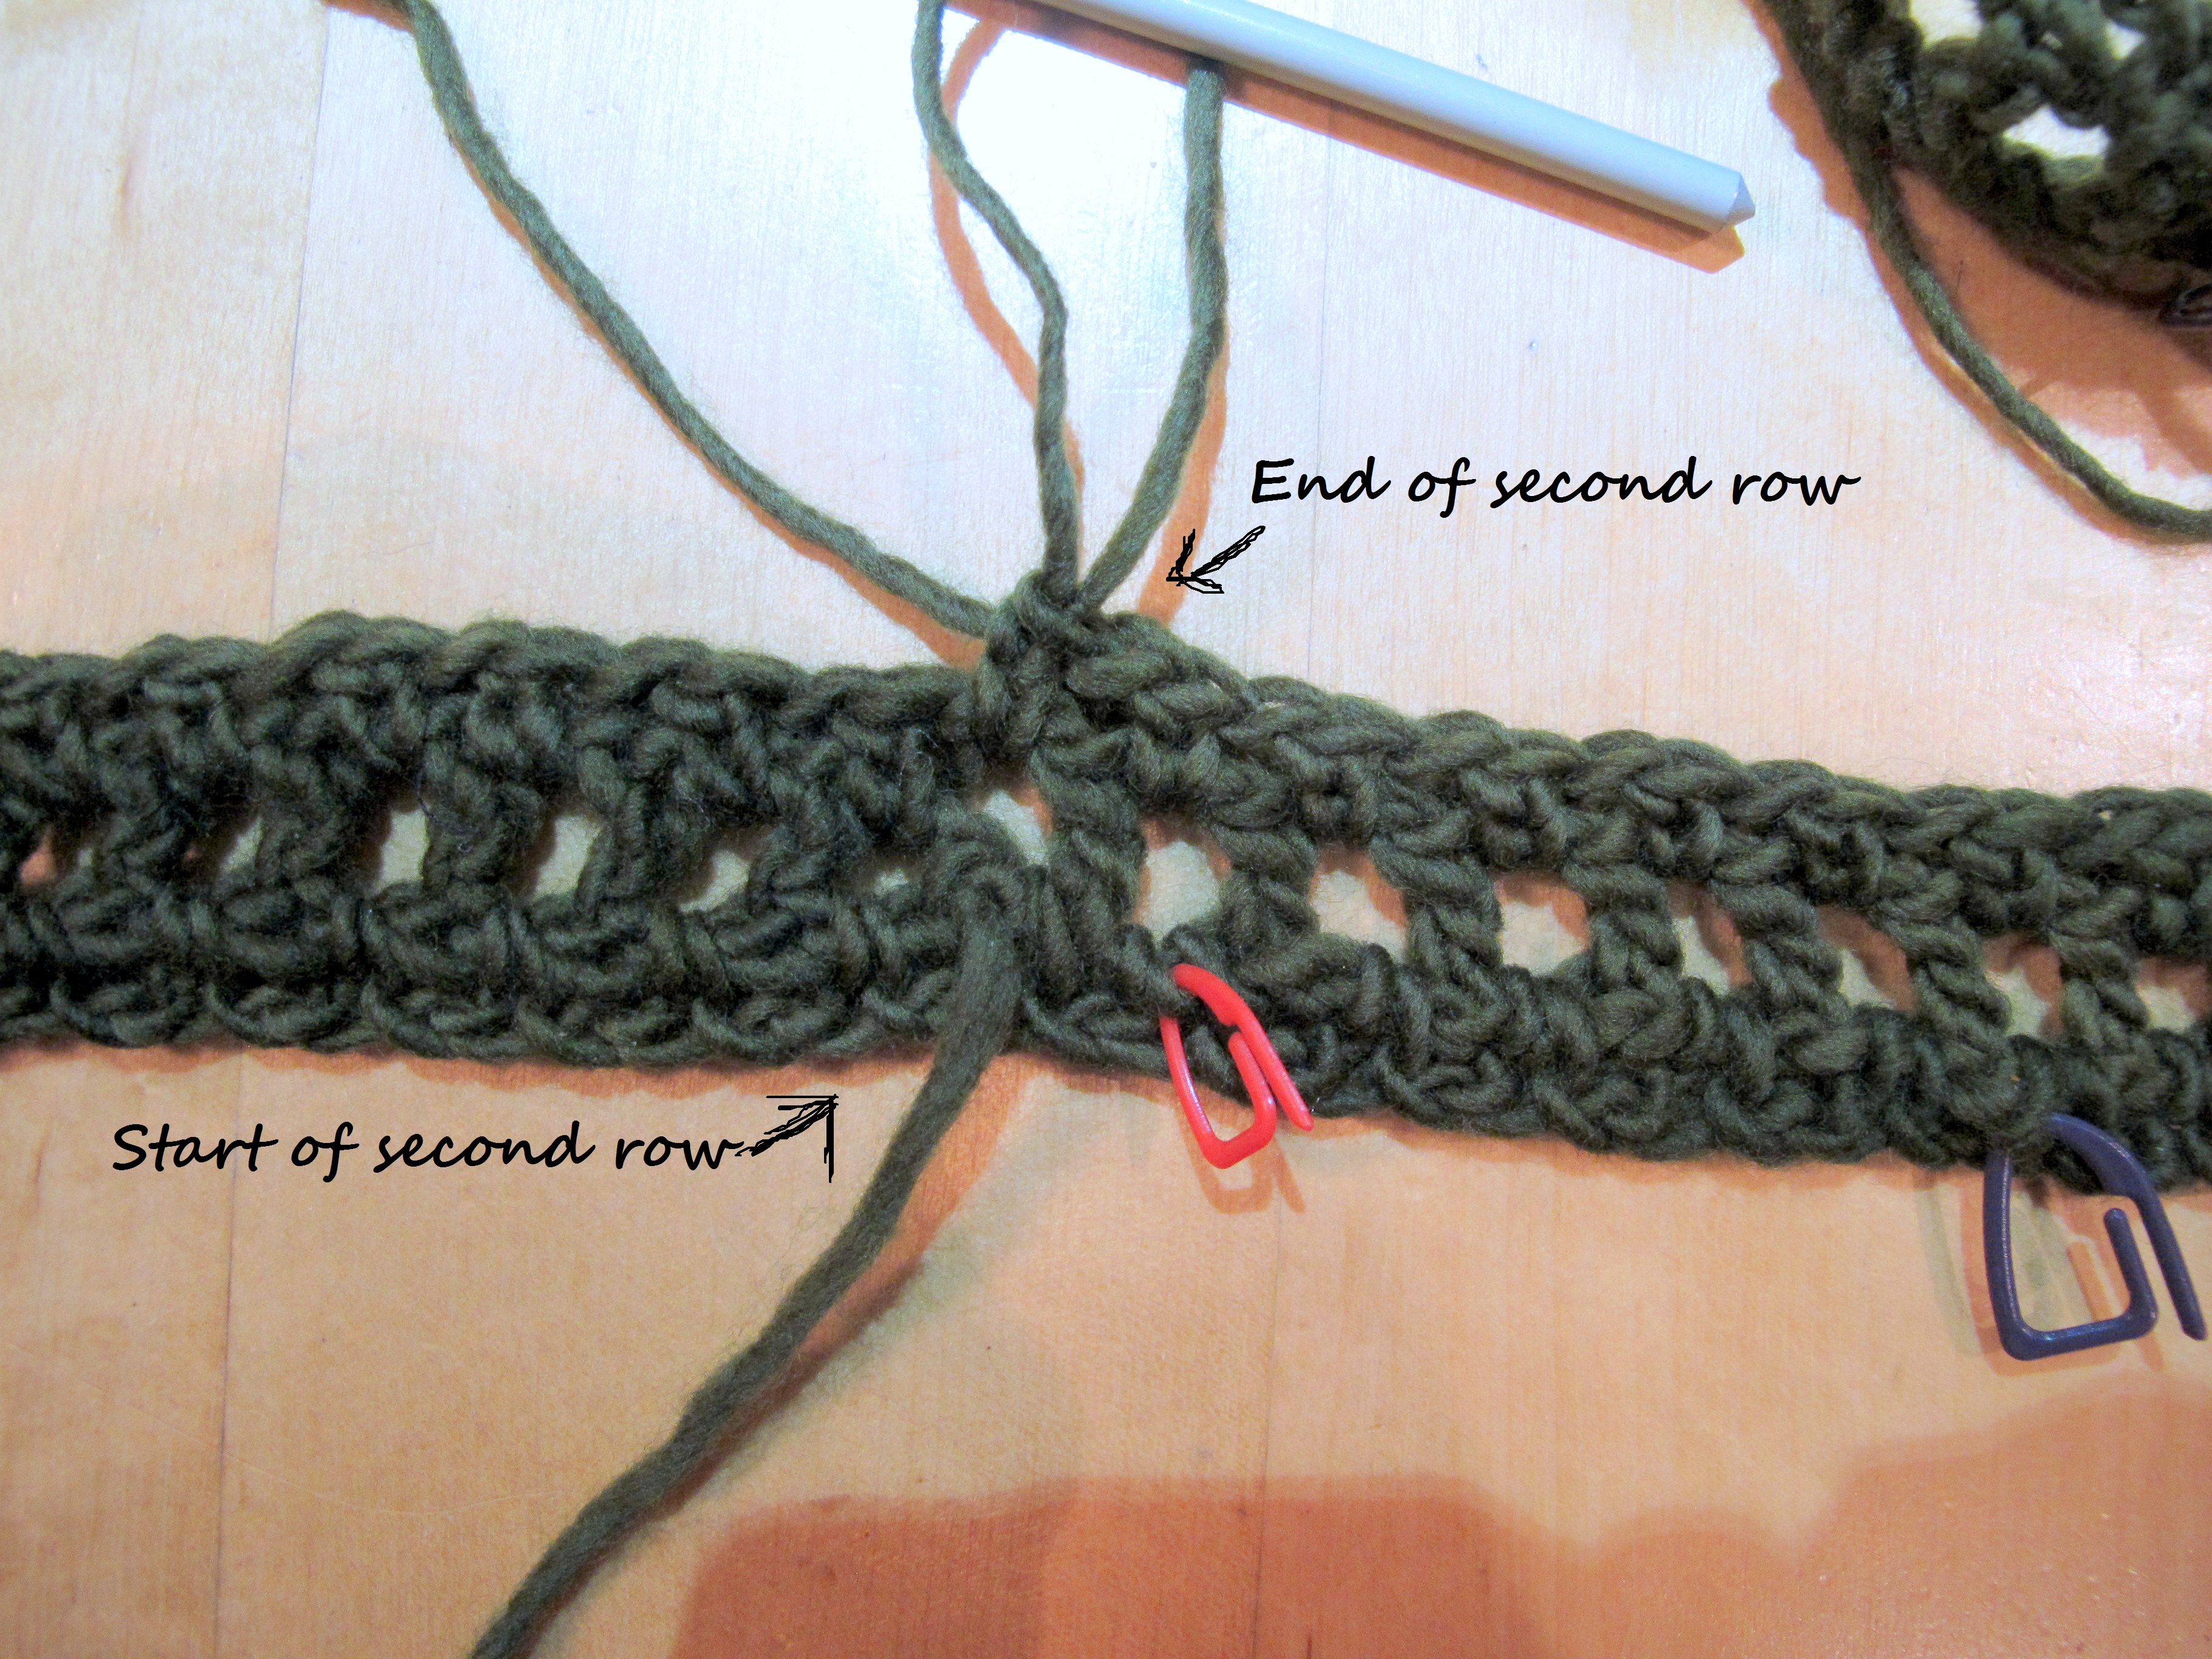
7. Simply continue to crochet. This is a picture of the end of the second row.
7. Haak gewoon verder. Dit is een foto van het einde van de tweede rij.
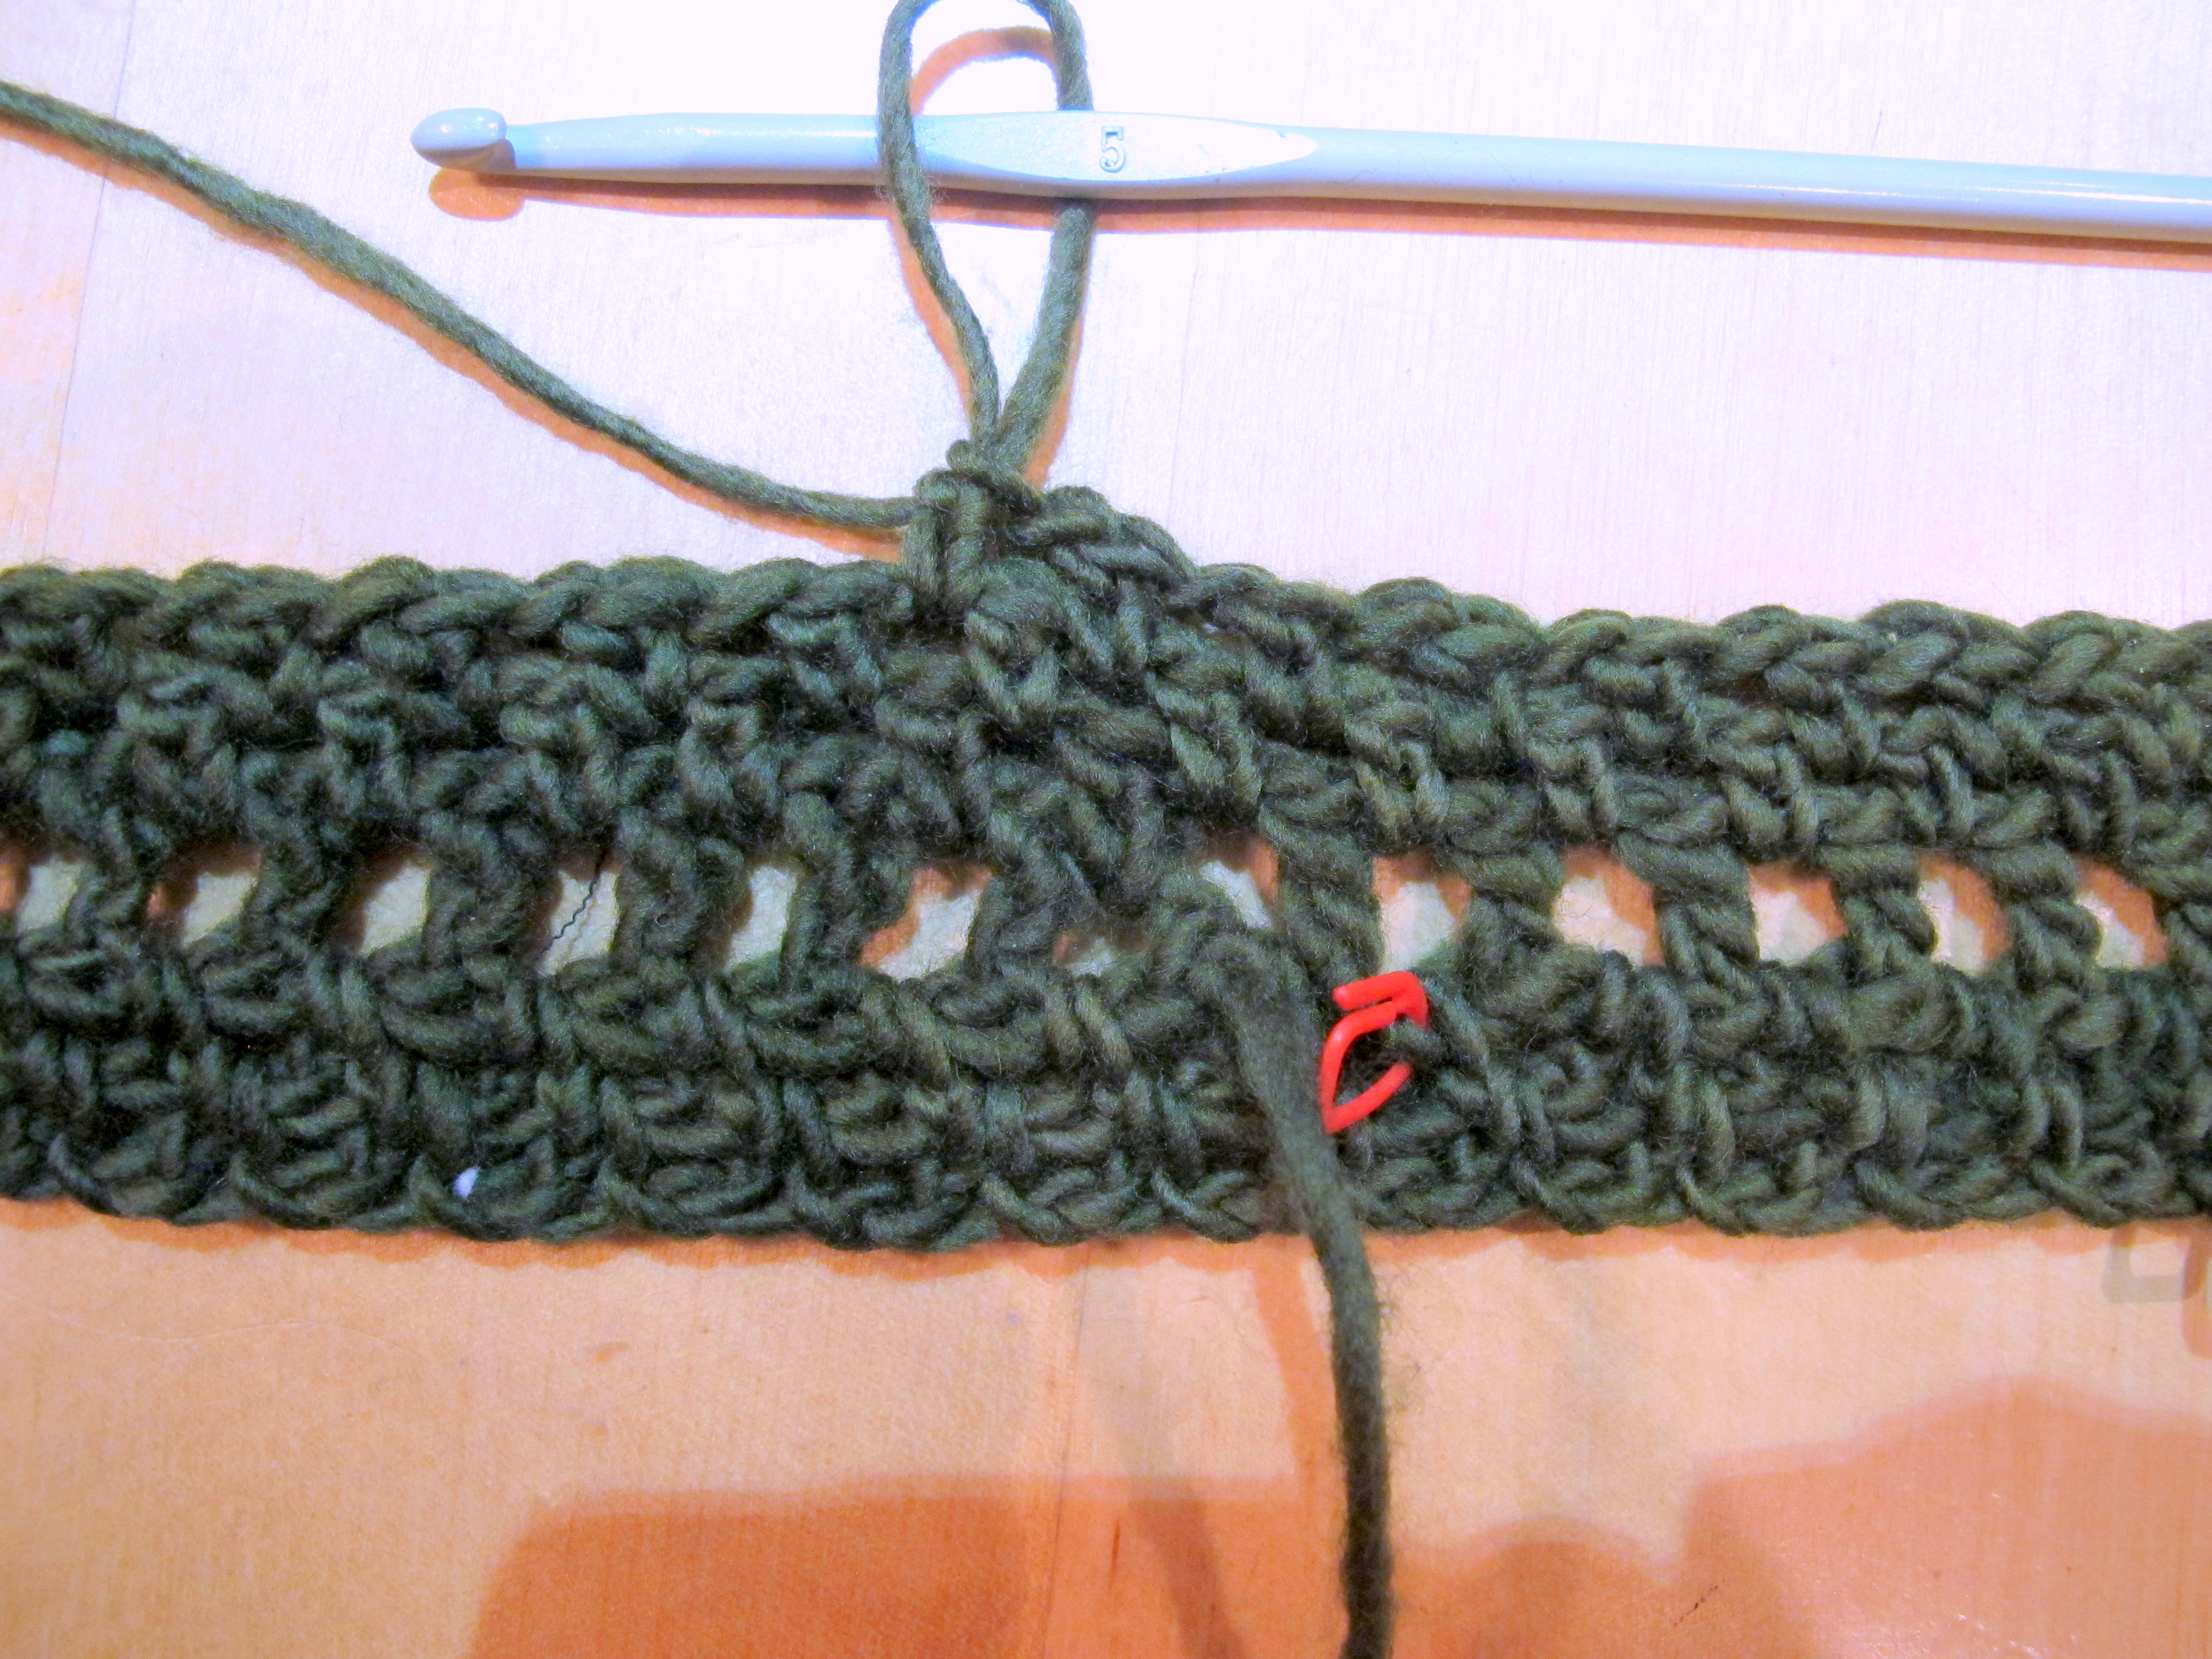
8. And this is a picture of a couple of rows later. Notice that you're adding rows at the "top" (that doesn't exist any more in fact) and the "bottom" at the same time. This is a good sign.
8. En dit is een foto van nog een paar rijen verder. Merk op dat je tegelijk aan de "bovenkant" (die er eigenlijk niet meer is) en de "onderkant" (idem) rijen bijhaakt. Dat is een teken dat je goed bezig bent!
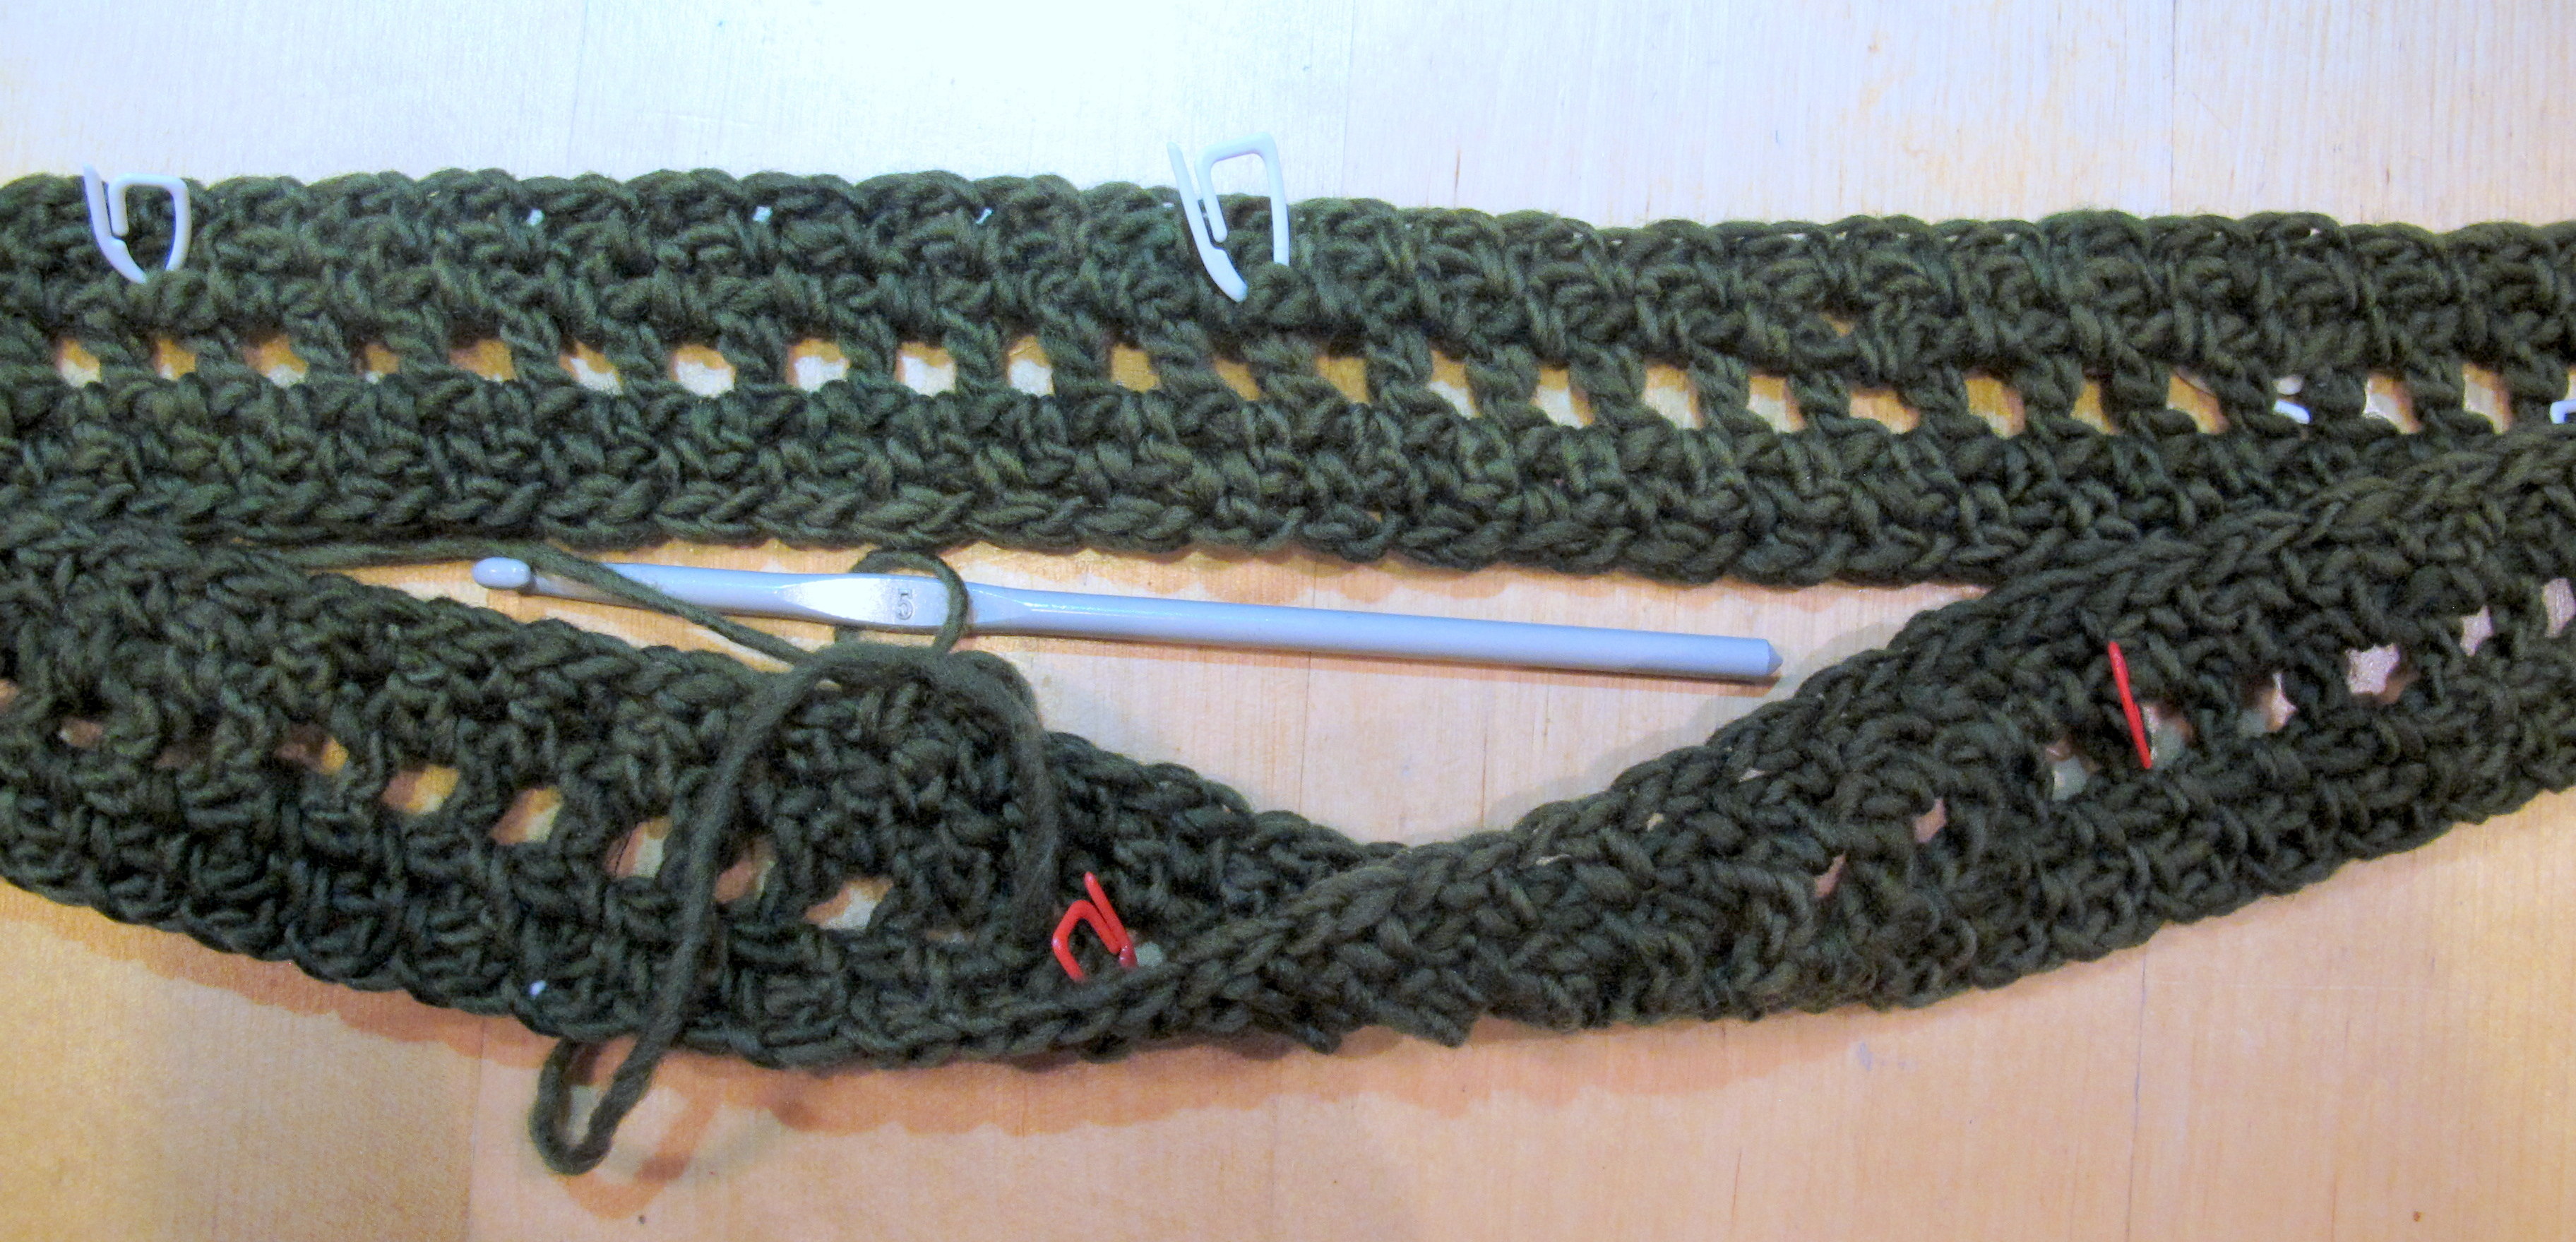
9. A couple of rows later the typical Moebius turn is becoming very clear. Check again that there's only one turn in your cowl!
9. En na een paar rijen zie je heel duidelijk de typische draai in je moebius-sjaal verschijnen. Controleer nog eens goed dat je sjaal maar één keer draait!
10. You could crochet in all eternity now, as there's no beginning or no end to your rows. In practice, you'll stop when you run out of yarn :-) Crochet until you're satisfied with the width of your cowl. Done! You can see pictures of my finished Moebius cowl here.
10. Je kan nu tot in het oneindige (in de praktijk: tot je wol op is) verder haken zonder ooit je werk te moeten draaien of een nieuwe rij te beginnen. Haak tot je sjaal breed genoeg is naar je smaak. Gedaan! Je kan foto's van mijn afgewerkte Moebius-sjaal hier bekijken.
Geen opmerkingen:
Een reactie posten